Chapter 06 Chapter 6: Conditional GANs: Steering Creativity with Labels
Imagine you have a magic drawing robot, and you want it to create colorful pictures for you. But the robot doesn't know what to draw on its own, so you need to tell it what you want. To make things exciting, you decide to give the robot special cards with hints (labels) on them.
Let's start with your Vanilla GAN:
At first, the robot is like a playful artist. It doesn't know what to draw, so it starts making random doodles with its magic crayons. Sometimes the drawings might look nice, but most of the time, they don't make much sense. It's just having fun without any specific purpose.
Introduce the concept of a Conditional GAN:
Now, you want to steer the robot's creativity and make it draw things you like. So, you give the robot some special cards with hints on them, like "draw a happy sun" or "draw a cute cat." These cards are like labels telling the robot what to create.
When the robot gets a card with a hint, it becomes a smart drawing robot! It takes the hint from the card and starts drawing exactly what you want. For example, if you give it to "draw a happy sun" card, it'll draw a lovely, smiling sun with bright colors. And if you give it the "draw a cute cat" card, it'll draw the most adorable little cat you've ever seen!
Now, every time you give the robot a different card with a hint, it will create a drawing that matches the hint. It's like having your own magical artist friend who can draw anything you imagine!
A Conditional GAN is like a magic drawing robot that you can guide with special cards (labels) to draw exactly what you want. It steers its creativity, and you get to enjoy the fantastic pictures it creates based on the hints you give it. Isn't that amazing?
Implementing Conditional GANs in Python
To modify a simple vanilla GAN implementation into a Conditional GAN (cGAN), you need to make changes to both the generator and discriminator architectures and the training process.
Step 1: Data Preparation:
In addition to your regular image dataset, you need to have labeled data, where each image is paired with its corresponding label or hint. For example, if you're generating colorful images from grayscale sketches, you should have pairs of sketches and their corresponding colorful images along with the label "colorful."
Step 2: Generator Changes:
In a vanilla GAN, the generator takes random noise as input and generates fake images. In a cGAN, it takes both random noise and the label as input.
Concatenate the label with the random noise: Combine the random noise and the label into a single input vector that the generator will use to generate images.
Step 3: Discriminator Changes:
In a vanilla GAN, the discriminator takes images as input and predicts whether they are real or fake. In a cGAN, it takes both the image and the label as input.
Concatenate the label with the image: Combine the label with the image to create a joint input for the discriminator.
Step 4: Loss Function Changes
In a vanilla GAN, the loss function for the generator and discriminator is based on how well the discriminator distinguishes between real and fake images. In a cGAN, the loss function includes an additional term to match the predicted label.
You have the Conditional Loss, in addition to the regular GAN loss, add a conditional loss term that compares the predicted label by the discriminator with the input label.
Step 5: Training Process Changes:
The training process is similar to a vanilla GAN, but now you need to provide both real images with their labels and random noise with labels to the generator and discriminator.
- During each training iteration, provide pairs of real images and their corresponding labels to the discriminator.
- Also, provide the generator with random noise and their corresponding labels.
- Calculate the losses based on the discriminator's performance in classifying real/fake and matching the labels.
- Update the generator and discriminator based on their respective losses.
These modifications, you've turned a simple vanilla GAN into a Conditional GAN. Now, the generator will create images based on the provided labels, and the discriminator will learn to not only distinguish between real and fake images but also let you generate images that match the given labels. This way, you can steer the creativity of the GAN to create images according to your desired labels or hints.
Generating Images with Specific Attributes
Conditional GANs (cGANs) generate images with specific attributes by incorporating conditional information during both the training and generation processes. Unlike standard GANs, which produce images based on random noise, cGANs take additional input in the form of condition labels or attributes.
During training, the cGAN is provided with paired data, where each real image is associated with its corresponding condition label. For example, in the case of generating colorful images from grayscale sketches, the grayscale sketch would be the input image, and the condition label would be "colorful." The generator takes both the random noise and the condition label as input and attempts to produce an image that matches the given label.
The discriminator in a cGAN is also modified to consider the condition label when distinguishing between real and generated images. It takes both the generated image and the corresponding condition label as input and provides feedback to the generator on how well the generated image matches the specified attributes.
During the generation process, when you want to create an image with specific attributes, you provide the desired condition label as input to the trained generator instead of random noise. The generator then uses this input condition to produce an image that fulfills the specified attributes. For example, if you want to generate a colorful image of a smiling sun, you would input the condition label "colorful" and "smiling sun" to the generator, and it will generate an image of a colorful sun with a smile.
cGANs generate images with specific attributes by conditioning the generator and discriminator on additional information (condition labels) during both training and generation. This allows the cGAN to produce images that align with the specified attributes, making it a powerful tool for controlled and targeted image synthesis.
Fashion MNIST
The Fashion MNIST dataset of 60,000 28x28 grayscale images of 10 fashion categories (which can be used as 'labels'). Not just training for images, but images of a specific type.

Implementation (Beyond Purely Random)
Extend the Vanilla GAN to take in 'label' information - so the generated result is steered based on some criteria. For this example, you'll use the Fashion categories as the labels from the Fashion MNIST dataset.
import os
import torch
from torch import nn
import torch.optim as optim
from torch.utils.data import DataLoader
from torchvision import datasets, transforms
import matplotlib.pyplot as plt
import numpy as np

# Configurable variables
NOISE_DIMENSION = 64
GENERATOR_OUTPUT_IMAGE_SHAPE = 28 * 28 * 1
BATCH_SIZE = 128
LEARNING_RATE = 0.0002
NUM_EPOCHS = 5000
NUM_CLASSES = 10  # Number of classes in the Fashion-MNIST dataset

# Device configuration (GPU or CPU)
device = torch.device('cuda' if torch.cuda.is_available() else 'cpu')

"""
Fashion-MNIST dataset (28x28 gray scale images)
"""
transform = transforms.Compose([
    transforms.ToTensor(),
    transforms.Normalize((0.5,), (0.5,))
])

dataset = datasets.FashionMNIST(root='data', train=True, transform=transform, download=True)
data_loader = DataLoader(dataset=dataset, batch_size=BATCH_SIZE, shuffle=True)

"""
Conditional GAN Generator
"""
class Generator(nn.Module):
    def __init__(self):
        super(Generator, self).__init__()
        self.label_emb = nn.Embedding(NUM_CLASSES, NUM_CLASSES)  # Embedding for condition labels

        self.model = nn.Sequential(
            nn.Linear(NOISE_DIMENSION + NUM_CLASSES, 128),
            nn.LeakyReLU(0.25),
            nn.Linear(128, 256),
            nn.LeakyReLU(0.25),
            nn.Linear(256, 512),
            nn.LeakyReLU(0.25),
            nn.Linear(512, GENERATOR_OUTPUT_IMAGE_SHAPE),
            nn.Tanh()
        )

    def forward(self, noise, labels):
        # Concatenate the noise and condition labels
        gen_input = torch.cat((self.label_emb( labels.to(device) ), noise), -1)
        return self.model(gen_input)


G = Generator().to(device)

"""
Conditional GAN Discriminator
"""
class Discriminator(nn.Module):
    def __init__(self):
        super(Discriminator, self).__init__()
        self.label_emb = nn.Embedding(NUM_CLASSES, NUM_CLASSES)  # Embedding for condition labels

        self.model = nn.Sequential(
            nn.Linear(GENERATOR_OUTPUT_IMAGE_SHAPE + NUM_CLASSES, 512),
            nn.LeakyReLU(0.25),
            nn.Linear(512, 256),
            nn.LeakyReLU(0.25),
            nn.Linear(256, 1),
            nn.Sigmoid()
        )

    def forward(self, image, labels):
        # Concatenate the image and condition labels
        dis_input = torch.cat((image.view(-1, GENERATOR_OUTPUT_IMAGE_SHAPE), self.label_emb( labels.to(device) ) ), -1)
        return self.model(dis_input)


D = Discriminator().to(device)

# Loss and optimizer
criterion = nn.BCELoss()
d_optimizer = optim.Adam(D.parameters(), lr=LEARNING_RATE)
g_optimizer = optim.Adam(G.parameters(), lr=LEARNING_RATE)


for epoch in range(0, NUM_EPOCHS):
    data_iterator = iter(data_loader)
    images, labels = next(data_iterator)

    batch_size = images.size(0)
    images = images.reshape(batch_size, -1).to(device)

    # Labels for real and fake images
    real_labels = torch.ones(batch_size, 1).to(device)
    fake_labels = torch.zeros(batch_size, 1).to(device)

    # Training the discriminator
    # Real images
    outputs = D(images, labels)
    d_loss_real = criterion(outputs, real_labels)
    real_score = outputs

    # Fake images
    z = torch.randn(batch_size, NOISE_DIMENSION).to(device)
    fake_images = G(z, labels)
    outputs = D(fake_images.detach(), labels)
    d_loss_fake = criterion(outputs, fake_labels)
    fake_score = outputs

    # Total discriminator loss
    d_loss = d_loss_real + d_loss_fake

    d_optimizer.zero_grad()
    g_optimizer.zero_grad()
    d_loss.backward()
    d_optimizer.step()

    # Training the generator
    z = torch.randn(batch_size, NOISE_DIMENSION).to(device)
    fake_images = G(z, labels)
    outputs = D(fake_images, labels)
    g_loss = criterion(outputs, real_labels)

    d_optimizer.zero_grad()
    g_optimizer.zero_grad()
    g_loss.backward()
    g_optimizer.step()

    if epoch % 100 == 0:
        print(f"Epoch [{epoch+1}/{NUM_EPOCHS}], Step [{epoch}/{len(data_loader)}], "
              f"D_loss: {d_loss.item():.4f}, G_loss: {g_loss.item():.4f}, "
              f"D(x): {real_score.mean().item():.2f}, D(G(z)): {fake_score.mean().item():.2f}")

"""
Display the fake image from the generator
"""
generaged_images = G(z, labels)[0]
generated_image = generaged_images.reshape(28, 28).detach().cpu().numpy()
plt.imshow(generated_image, cmap='gray')
plt.axis('off')
plt.savefig(f'generated_image.png')
plt.close()
Output
After running for only 5000 iterations, the result will start to create shapes that are more than just 'random'. Example output is given below:
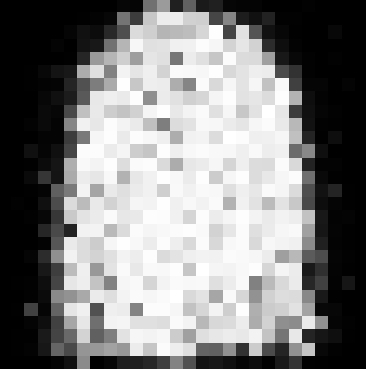
As the number of iterations increases, the result will gradually keep getting better and better.
Taking it Further
Once you've got the concept down, you'll be thinking of what labels you can tag to your data. At first, this might seem like hard work, especially if you've got to tag tens of thousands of images!
However, you want to work smarter and take advantage of other pre-trained networks. For example, there are networks that can identify features on a face (e.g., eye locations, ears, nose and mouth). You could then run your real image through this first, gather the face information and pass this in with your cGAN as labels.
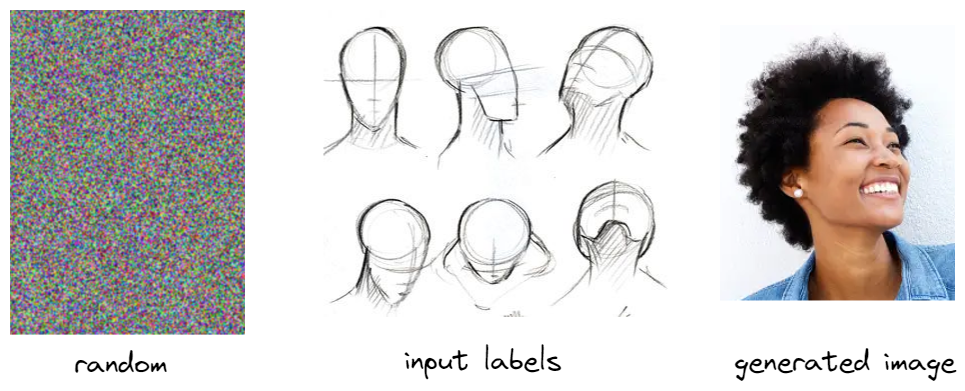
When you generate your face images, you can specify characteristics, such as, the direction the face is looking, the eye or mouth size, the type of face (scrunched up) - so you're able to steer your creative GAN towards a solution that is what you want.
Lots of networks out there for categorising image elements which can be a useful resource for your GAN.